Console UI Module
The JLine Console UI module provides interactive prompt components for console applications, inspired by Inquirer.js. It offers a set of UI elements for creating user-friendly command-line interfaces.
Introduction
ConsoleUI is a library for prompting the user for different types of input. It provides simple UI elements on ANSI console-based terminals. ConsoleUI was initially implemented using JLine2 by Andreas Wegmann and was later upgraded to use JLine3 and merged into the JLine project.
Features
Console UI currently supports:
- Text input with completion and GNU ReadLine compatible editing
- Checkboxes for multiple selections
- Lists for single item selection
- Expandable choices (multiple key-based answers for a question with help)
- Yes/No confirmation prompts
Watch a demo of ConsoleUI on YouTube
Quick Start Example
Here's a simple example to get you started with ConsoleUI:
Loading snippet: ConsoleUIBasicExample...
Basic Usage
The entry point to the builder classes is to create a new object of type ConsolePrompt. From the prompt object, use the getPromptBuilder() method to create the builder for all subsequent UI elements.
From this PromptBuilder you can access UI builders with the following methods:
createCheckboxPrompt(): Creates a checkbox prompt that lets the user choose any number of items from a listcreateChoicePrompt(): Creates a choice prompt that lets the user choose one from a given number of possible answerscreateConfirmPromp(): Creates a confirmation prompt that lets the user answer with 'yes' or 'no'createInputPrompt(): Creates an input prompt for text entry with optional masking and completioncreateListPrompt(): Creates a list prompt that lets the user choose one item from a list
Prompt Types
Input Prompt
The InputPrompt is a classic entry line like a shell. It offers completers and optional password masking.
Loading snippet: ConsoleUIInputExample...

The user can use readline compatible navigation (Emacs control codes) inside the input area, including CTRL-a to go to the beginning of input, CTRL-e to go to the end, and so on.
List Prompt
The list prompt lets the user choose one item from a list.
Loading snippet: ConsoleUIListExample...
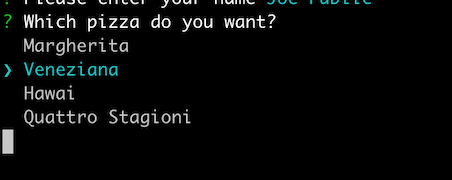
The user can navigate with arrow keys or VI-like keys ('j' for down, 'k' for up) and select an item with Enter.
Checkbox Prompt
The checkbox prompt lets the user choose any number of items from a list.
Loading snippet: ConsoleUICheckboxExample...
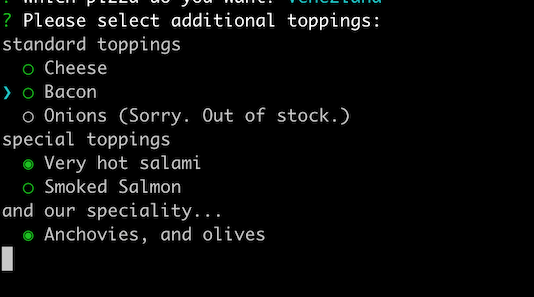
The user can navigate with arrow keys and toggle selection with the space bar. Pressing Enter completes the input.
Expandable Choice Prompt
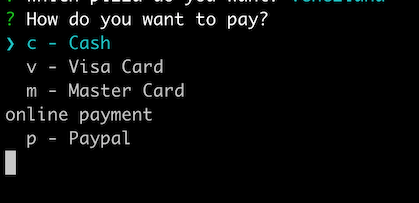
The choice prompt lets the user choose one from a given number of possible answers, each assigned to a single keystroke.
Loading snippet: ConsoleUIChoiceExample...
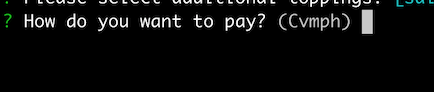
By default, only the message and possible keys are displayed. If the user presses 'h' (for help), all possible answers with explanations are shown as a list.
Confirmation Prompt
The confirmation prompt lets the user answer with 'yes' or 'no' to a question. This was shown in the Quick Start Example above.

The user can press 'y' or 'n' to select between 'yes' and 'no', and Enter to confirm.
Advanced Features
Page Size Control
For long lists, you can control how many items are displayed at once:
// Set absolute number of items (default is 10)
.pageSize(15)

// Or set a percentage of terminal height (66 = 2/3 of terminal)
.relativePageSize(66)
Disabled Items
You can disable items and display a message explaining why, as shown in the Checkbox example above with the pineapple topping:
.newItem("premium").text("Premium Feature").disabledText("Requires subscription").add()
Pre-checked Items
For checkbox prompts, you can pre-check items as shown in the Checkbox example above:
// Method 1
.newItem("olives").text("Olives").check().add()

// Method 2
.newItem("special").text("Special").checked(true).add()
Maven Dependency
To use the Console UI module in your Maven project, add the following dependency:
<dependency>
    <groupId>org.jline</groupId>
    <artifactId>jline-console-ui</artifactId>
    <version>${jline.version}</version>
</dependency>